Not so long ago I was asked about solderless circuits kits. Snap circuits kits were the first that came to mind. Then I had to think a bit… And here we are: breadboard kits! But before going into details of any starter kits, let me tell you a bit about a breadboard and how to use it.
What is a breadboard?
Breadboard is a rectangular piece of plastic with lots of tiny mounting holes in it. In order to build electronic circuits quickly and easily, you need to push electronic components into these holes. You can create a huge amount of circuits, from the simple ones with a battery and on/off switch to control a light, to more complicated with automatically flashing lights and robots of all shapes and sizes.
About the origin of the word “breadboard” in electronics
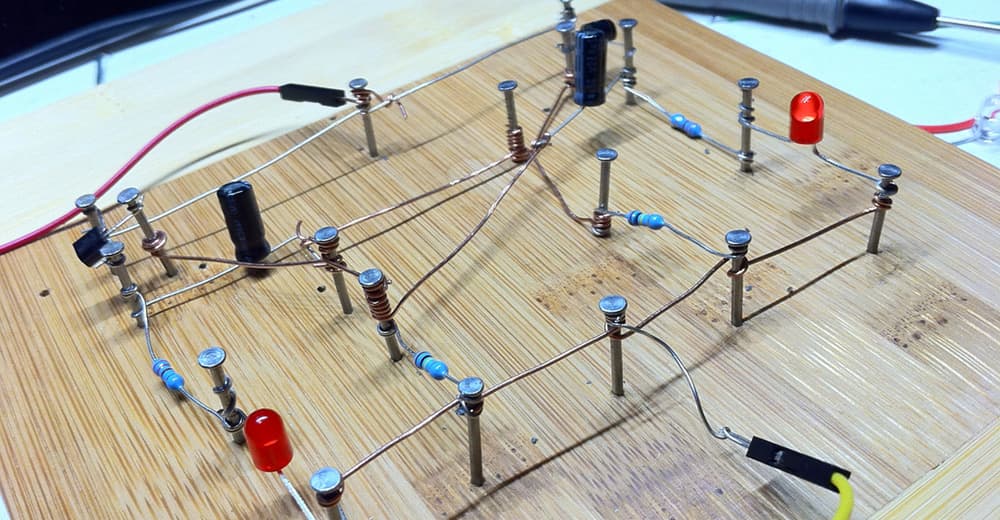
Modern breadboards have nothing to do with bread. The name “breadboard” goes to the first steps of electronic circuits when people used wooden cutting boards with nails and crews to make electronic connections. Nowadays we call them projects.
Modern breadboards
Modern breadboards are made from plastic, and they come in all sizes and shapes, and sometimes, even different colors. The most common sizes are called full-size breadboard, half-size and mini-size breadboards.
Larger and smaller sizes are also available, and lots of breadboards come with notches and tabs on the side allowing you to snap two or more of them together.
How does a breadboard work?
The mounting holes of a breadboard allow you to insert metal legs, or leads of the components. Once any component is in, the connection is strong enough: it won’t fall out, and it’s very easy to take it out in case you made a mistake and need to place it in another location.
That’s why these types of breadboards are called solder-free, or solderless: new connections can be made without soldering.
What are breadboards used for?
Breadboards are used to prototype circuits.
Best Starter kits with Breadboards in June, 2025 Review
Now let’s have a look at some of the starter kits with breadboards. They are suitable for kids and adults. No soldering, quick and easy way to change any component when needed, great variety of projects are indisputable advantages of these types of kits.
Note: Above I’ve mentioned the possibility to snap mini-boards, however, just to let you know, for most beginners’ projects a single breadboard would be more than sufficient.
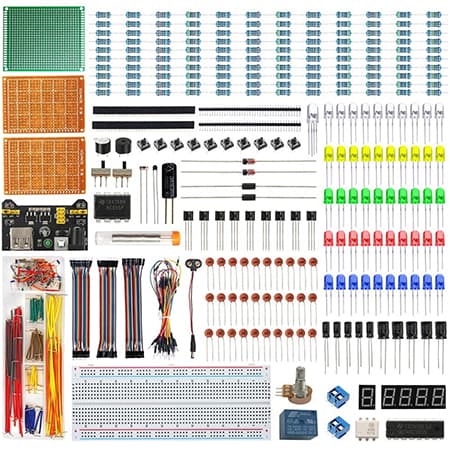
WayinTop Electronics Component Fun Kit
This Wayin Electronics Component kit comes with breadboard, power supply, PCB board, many electronic components for a lot of options for various DIY electronic projects. All the items are very well organized, labeled; they are easy to identify and use.
If you don’t have a chance to get to the local store and buy everything you need for your DIY projects, this kit is exactly what you are looking for. It will help you to understand how basic circuits work, how to use wire jumpers in the breadboard, and much more.
The kit includes enough components to support Arduino, Raspberry pi, ESP32, ESP8266 and other microcontrollers. If you need to get started with any of the above, this kit features absolutely everything you want.
Tip: If you are an absolute beginner, I’d recommend you to start with basic circuits and then go Arduino and programming. You have so many components provided with the kit, that they can keep you busy for a long time. Just start with basic things and go to more creative ones! Add Arduino at a later stage as you learn more about programming.
Note: The tutorial is not included into the package. In order to get it, you need to download it from internet. The link is in the section “Product Information”.
Pros:
- Tutorial with basic information about Arduino board, sensors and components
- Multiple good-quality components
- Great value for money
Cons:
- Tutorial is not included
- Arduino board is not included
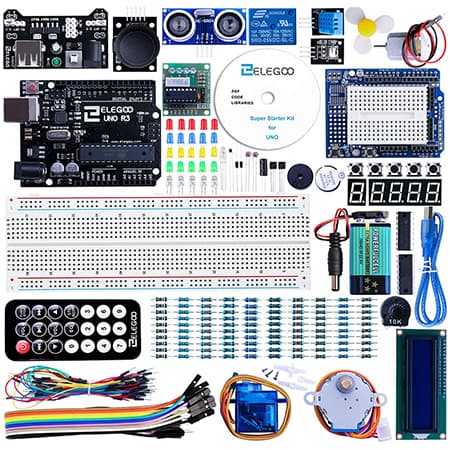
ELEGOO UNO Project Super Starter Kit
This ELEGOO kit is a great choice for STEM education and Arduino learning. With this kit you can light colors, make things moving, ring the alarm, start to build your own robots and more. The biggest advantage of this kit is so called “cloned” Arduino UNO R3. It’s 100% compatible with official Arduino UNO R3, MEGA 2560 R3, NANO.
This starter kit comes with everything you could need to make your first steps with Arduino. The included CD has all the information, codes samples and instructions required for installation of Arduino software.
The kit includes 2 different solder-free breadboards, and a power supply module, two different motors and a servo. I can assure you that there are more than enough components to make up to hundred Arduino projects. It also has 7-segments display with several sensor modules allowing you to display temperature, humidity, infrared, and more.
The kit is suitable for 10+ year olds. Younger kids would need certain guidance and assistance from adults.
Note: Elegoo’s boards are compatible with official Arduino microcontroller boards. It means that while building projects you can use an official Arduino software, codes and sensors.
Tip: 24 lessons tutorial and technical support can be found on the official site of the manufacturer, www.elegoo.com
Pros:
- UNO R3 is available
- Great starter kit based on Arduino platform
- Excellent tutorial and reference manual included
- High-quality components
- 7-segment display
- Power supply module and 9V battery with DC included
- Good value for money
Cons:
- There were some complaints that there were not enough of jumper wires in the kit: after making several projects they run out of them. They had to buy additional set of wire jumpers.
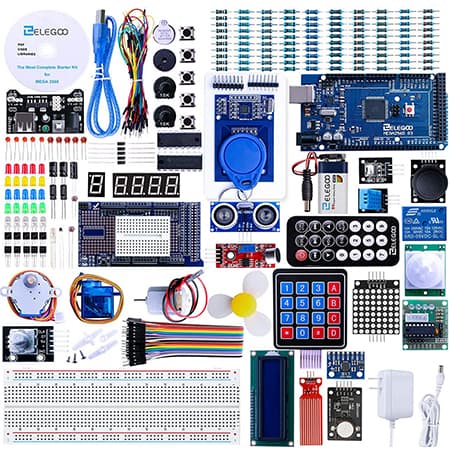
ELEGOO Mega 2560 Project – The Most Complete Ultimate Starter Kit
Compared to the ELEGOO UNO Project Super Starter Kit, this kit is indeed the most complete starter kit with high-quality components and sensors I’ve ever seen. With all the components included you can build lots of projects, for instance, make a water level detector, IR control the servo, movement tracker with LED matrix, and more.This kit comes with the most valuable parts: MEGA 2560 controller board and expansion board. Both of them are 100% compatible with Arduino. LCD1602 display module is also part of the kit. It can display two rows with up to 16 characters on each row.
Note: This kit is for more advanced users, definitely not beginners.
Pros:
- More than 200 pcs premium-quality components to play with
- CD with 33 lessons-tutorial in 7 different languages
- 100% compatible with Arduino IDE
- LCD1602 display module included
- DC motor and L293D transistor are included
Cons:
- Might be a bit complicated for an absolute beginner and/or average hobbyist. It’s not a toy for a kid, it’s a tool with real electrical components. Some experience and knowledge are required to get started with this kit.
Typical mistakes when building circuits on a breadboard
If you have never ever built any circuits on a breadboard, try to avoid the most common mistakes stated below:
- Wrong connection. Every time you build a circuit, double check the wiring and make sure the connections are in the right place.
- Not firmly pushing leads or wires into the breadboard. Make sure the connection is not loose, it stays secure and pushed firmly in all the way. In case the breadboard is moved, the LED or any other improperly fixed component may go out.
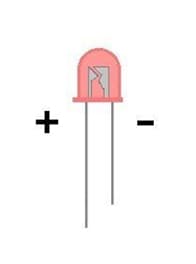 Wrong polarity. Some of the components have polarity. It means that the direction they are facing matters a lot. Make sure you are using correct polarity. The best example is LED: the longer leg is the positive side, plus (+), the shorter is the negative side, minus (-). The Longer leg has to be connected to the battery pack’s red.
FAQ
1) How does the breadboard hold components without solder?
If you flip the breadboard over, you will see an adhesive backing allowing you to permanently stick it to the project. If you remove the backing completely, you will see a series of metal strips that are inside the breadboard. These metal strips with clips are responsible for making mechanical and electrical connections to the components you place into the breadboard. When you push a lead into one of the holes, it’s being grabbed by the clips. Some breadboards are made from transparent plastic, so you can see the clips from outside.
2) What is the meaning of red and blue lines in the breadboard?
Red and blue lines are called buses, or power buses, or rails and are used to supply power to the circuit. Blue line is with minus (-) (negative), red line has plus (+) (positive). The red one labeled with a plus (+) needs to be connected to the positive battery terminal, and the blue one, with a minus (-) – to the negative terminal of the battery.
3) Do mini breadboards have power buses?
No, they do not.
4) How many holes are linked by a metal strips of any breadboard?
Usually there are 5 holes, linked by one metal trip.
5) Long leg – positive, short leg – negative. Is this rule applicable to all LEDs?
Yes. This is the way to distinguish two different poles of the LED, positive and negative.
6) Is it possible to make my own jumper wires?
Yes, it is. There are two options: 1) To buy a jumper wire kit with pre-cut to certain lengths wires. 2) To buy special spools of wire, so called hookup wire, and with a help of a wire stripper strip off some of the insulation and make your own jumper wire. Tip: if you decide to buy your own hookup wire, make sure you are buying solid-core wire (a wire, made of a single piece of metal; it’s very stiff and easy to push into the breadboard) and (made of multiple individual smaller strands, it’s more difficult to deal with).
Conclusion
Starter kits with breadboards are really a great fun to deal with. However, you should have some experience and basic knowledge of electronics and electricity.
In this review I wrote not only about kits but about types of breadboards and how to use them. Hope this information will help you not to get lost in the wide range of various tutorials available in the Net.
Good luck and have fun!
Table of Contents
