Hi, guys!
Today we’re going to control a gate with a remote control universal clicker. We are going to make soldering points in there and connect our clicker. And after that we connect it to about 20 dollars Smarthome Wi-Fi module. This module works with Amazon Alexa and Google home. It’s called the eWeLINK Smarthome Module.
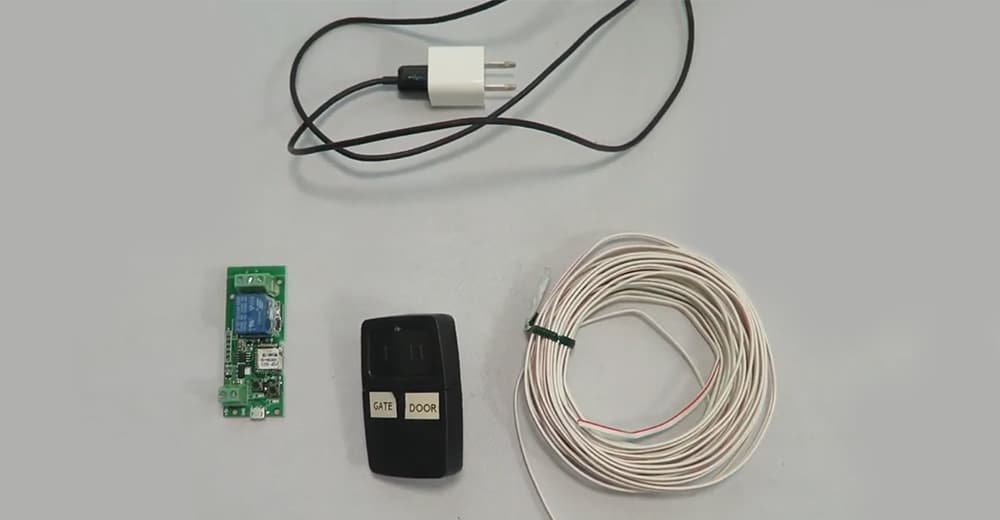
Above are the items you will need for a project “How to open the gate from the car using voice control”:
- micro USB,
- charging cord,
- power cord,
- some garage wire (thin stranded wire) (we’re going to wire that to our garage door button, which we’re going to wire to our gate)
- and a Wi-Fi Smarthome Module.
Before doing any soldering, I made a test and found out what pins should be involved. For this I’ve touched some pairs of pins together and found two, which are responsible for gate’s opening. They are located in the inner ends.
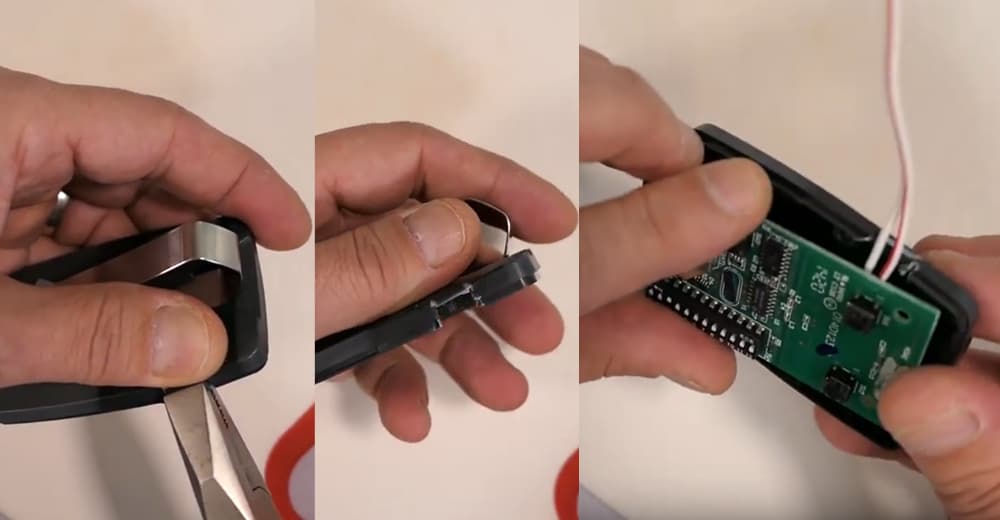
In the pictures below you can see how I’m doing a little soldering job connecting 2 wires to the board.
First I strand the wires and cut off 10 inches. Then I strip one end and solder the wire to one of the pins of the board. One point is done. I let that solidify there and cool off. After that i do the same with the second wire: solder it to the second pin and let it cool off.

Note: If you wish, you can protect the board by placing it in any matching size case. However, it’s optional and unnecessary.
I have an old case and I’ll try to reuse it in order to keep the board safe. I’m going to make a couple of cuts here onto the side. Before cutting the box, I’ve made a notch where the wires can come out. Now it’s done.
After that I have to strip the other end of the wire and connect it to the Wi-Fi Smarthome Module that will help me to connect it to the Amazon Alexa.
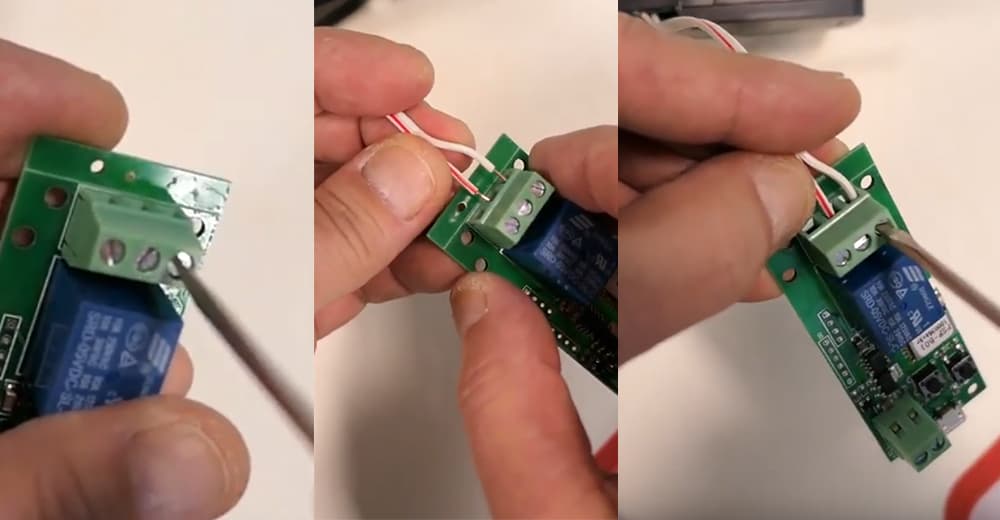
How to make connection to eWeLINK Smart WiFi Module?
You remember that a smart Wi-Fi module is working with Alexa and Google home. And we’re going to connect two wires that are left into the right two screw areas.
Now I’m going to strip this wire down and cut it off a bit (I don’t need that much). Strip the ends, just pool them apart and strip off a bit.
It doesn’t matter which wire goes to which hole. I just put them in the first two to the right. Then i take a screw driver and tighten those two screws down and snug them up.
This is the eWeLINK Smart WiFi Module which works with the eWeLINK application. After fixing i always give it a slight tug to make sure everything is done properly.
Hardware is done and now it’s time to program this module. It is going to give a momentary power surge to activate the button for the gate and it will automatically turn off.
Have a look at the pictures below. You can see the eWeLINK module opened up in my mobile device. If you need instructions on how to register for the eWeLINK module, you can find it in your App Store or on Google Play Store.
Now I’ve got the app open and I’ve already programmed the garage door before.
I’m going to add another device which is going to be the front gate, or driveaway gate. In order to do it, I’m going to hit the “plus” button. It’s asking me to quick pairing, and I’m going to press and hold the pairing button for 5 seconds until the LED blinks twice on repeatedly.
So, I’m going to press and hold this middle button until I get fast flashing light after 5 seconds. I got it and now I go back to the phone. I’ll press the next button.
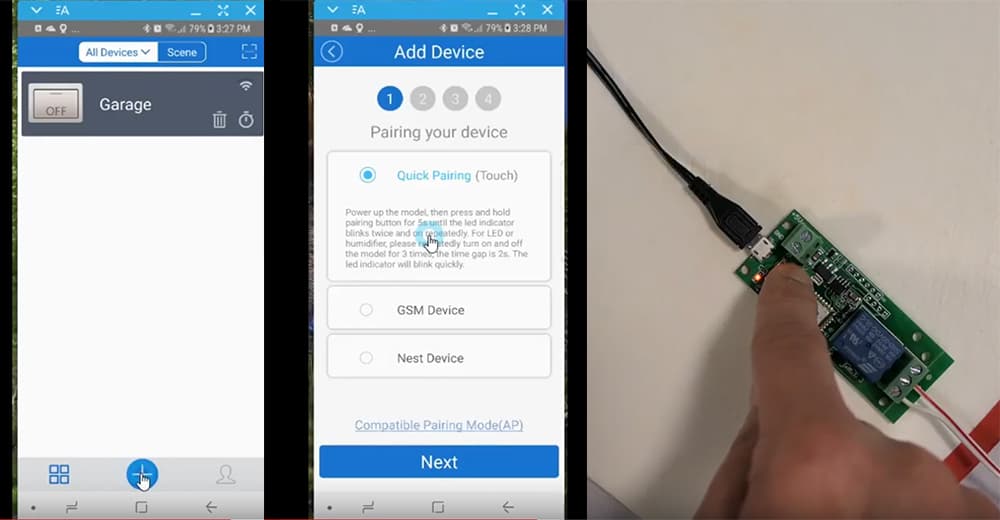
Then I will choose the Wi-Fi. Make sure to connect to 2,4 GHz Wi-Fi to have a good connection. Then it’s going to go ahead and pair to EWeLINK Module. The connection is established.
I’ve got it connected and I’m going to name this device “gate”. Then I press “OK” and I’ve got a “garage” and a “gate”.
If I press that button, power takes off. Now it’s going to give it a momentary surge of power to the button instead of holding the button “on”. It’ll just give it a little zap.
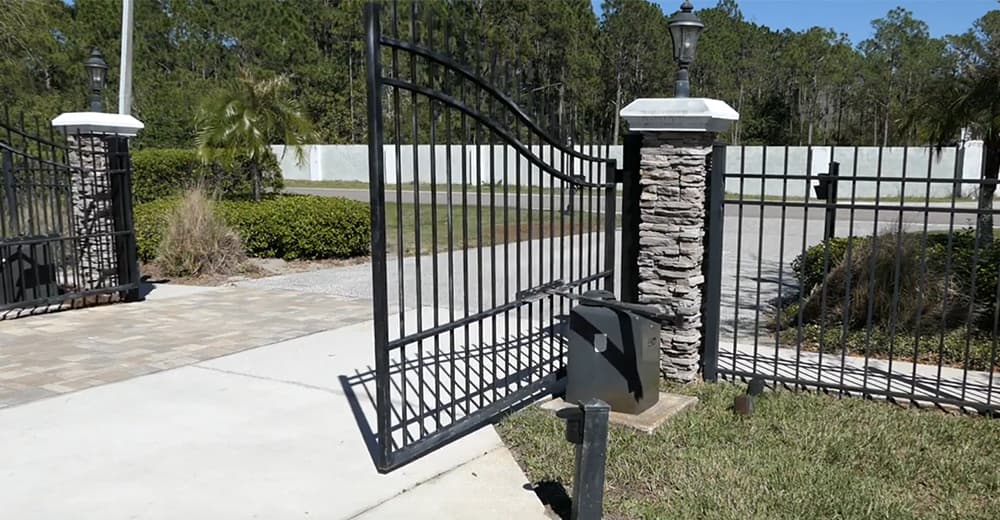
Now you know how to open the gate from the car using voice control.